

Welcome back everyone 👋 So today's blog is going to be another one of beginner friendly ones where we'll take a look at Amazon Container Services. As you might have guessed (or straight away know) from the title we are gonna be focusing on Elastic Container Registry (ECR) and Elastic Container Service (ECS) today.
📍 Prerequisites
Well there are no as such prerequisites but a clear understanding of what Docker, Containers, Images and all are would be good as you'll be able to relate with stuff much more easily that way. If you wanna learn about the above said stuff, then I have a blog where I have explained about all this and again if you're not a fan of reading then I also have a video on this up on my YouTube Channel so you can also check that out (wait lemme save you the trouble and share the link here itself😜)
Also one more prerequisite would be that you need to have an AWS Tier account for setting up your AWS account if you are using it for the first time, you can check out this video.
☁️ Let's get to the FUN part now, shall we?
So before we begin let's get a quick understanding of what ECR and ECS is and how do they function or work. Let's start with ECR then.
📦 Elastic Container Registry (ECR)
Amazon Elastic Container Registry (Amazon ECR) is an Amazon Web Service (AWS) product that stores, manages and deploys Docker images, which are managed clusters of Amazon EC2 instances. Amazon ECR allows all AWS developers to save configurations and quickly move them into a production environment, thus reducing overall workloads.
📍 So how does ECR work?
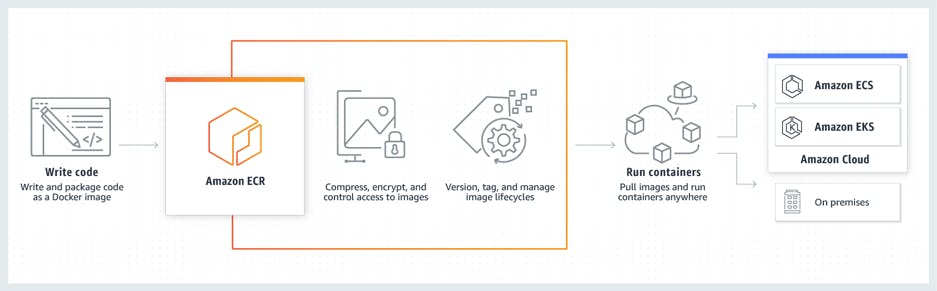
Amazon Elastic Container Registry writes and packages code in the form of a Docker image.
Next, it compresses, encrypts and manages access to the images -- including all tags and versions -- and controls image lifecycles.
Finally, the Amazon ECS pulls the necessary Docker images from the ECR to be used in the deployment of apps and continues to manage containers everywhere -- including Amazon Elastic Kubernetes Service (Amazon EKS), AWS cloud and on premise networks.
It kinda goes like this, if talking diagrammatically 😅
Woah Woah I know in the third point we're talking about Amazon ECS we're gonna talk about it in a little bit so hold your horses but we're gonna have a separate blog on Amazon EKS.
📦 Elastic Container Service (ECS)
AWS Elastic Container Service (ECS) is a fully managed container deployment service by Amazon. It enables you to deploy your containerized applications easily without having to configure an environment for the code to run it, with features like autoscaling and autorecovery. ECS comes with two launch types: AWS EC2 and AWS Fargate.
📍 So how does ECS work?
Just provide a description of your application along with its resource needs, and Amazon ECS will handle the launch, monitoring, and scaling of your application across adaptable computing options. It seamlessly integrates with other essential AWS services required by your application. You can also carry out system operations like establishing custom scaling and capacity rules, as well as examining and querying data from application logs and telemetry.
Again talking diagrammatically it looks or rather works something like this:

☁️ Let's deploy our application using Amazon ECR and ECS
📍 Creating an EC2 instance
I'm pretty sure we all are familiar with how we can launch an EC2 Instance but just be cautious make sure that you select server and size of instance that is within the free tier.
In my case I went with Ubuntu as my Server and "t2.micro" for my Instance size as they both lie within the free-tier, while you're at it make sure to generate a new key-pair for your instance, choose ".pem", if you are going to use SSH to connect to your instance, or ".ppk" if you are using putty & download it and now launch the instance.
Click on “Connect” and select the "EC2 instance connect” option to connect with our instance.
📍 Installing AWS CLI and Configure
Make sure you have AWS CLI configured. You can read more on how to download and configure AWS CLI here or else Let us get the installation done for AWS CLI 2
curl "https://awscli.amazonaws.com/awscli-exe-linux-x86_64.zip" -o "awscliv2.zip"
sudo apt install unzip
unzip awscliv2.zip
sudo ./aws/install
aws --version
Now we configure our AWS CLI with our account using "aws configure" command.
~ aws configure
AWS Access Key ID [None]: <Access_key>
AWS Secret Access Key [None]: <Secret_key>
Default region name [None]: us-east-1
Default output format [None]:
After installing and configuring our AWS CLI, we now need to make sure Docker is also installed on our system, we are not going to go in depth on how to install Docker if you however wanna learn and install Docker on your machine, you can check out the official documentation from here.
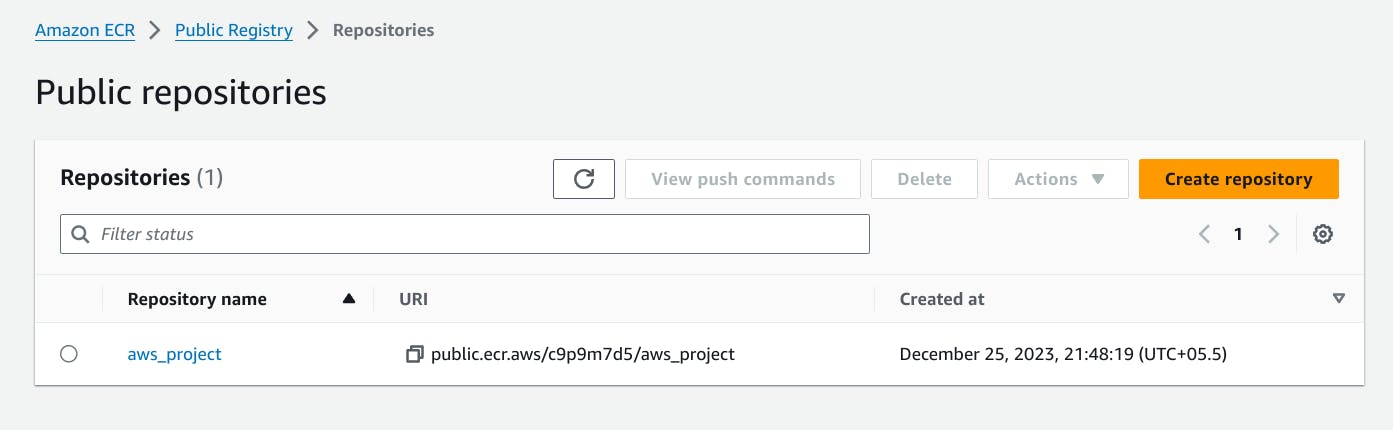
📍 Creating an ECR repository
We now head on over to ECR where we create a repository which will hold our Docker Image for the application.
- Here you only have to give a name for your repository and choose whether you want it to b private or public. Yes that's it, you don't have to do any other changes and once you do the same, you'll be able to see your repository listed as mine did.
Yes I was working with AWS on CHRISTMAS!!
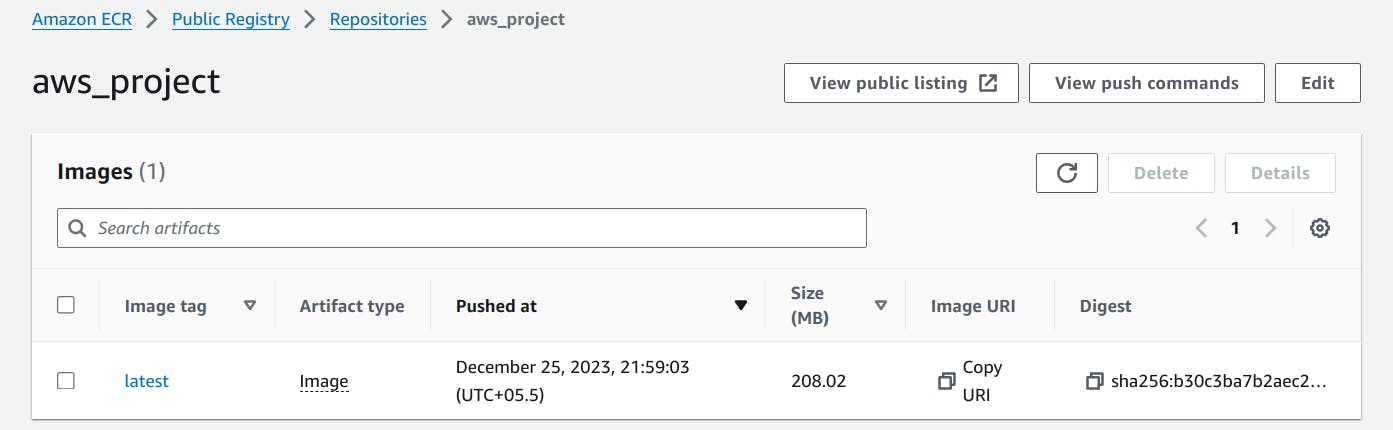
After successfully creating Repository now click on 'view push commands' and proceed to copy and paste those commands one by one onto each instance individually to build and push our docker image into the AWS container registry.
Note: Make sure Docker Engine is running on your local machine.
After running all the commands successfully, verify if the latest image has been pushed.
Honorable Mention: Here the application for this small project was taken from my fellow friend Yash Pimple's repository where he has made a Zomato Clone.
So now you can clearly see our Image has been pushed to our newly created repository!!
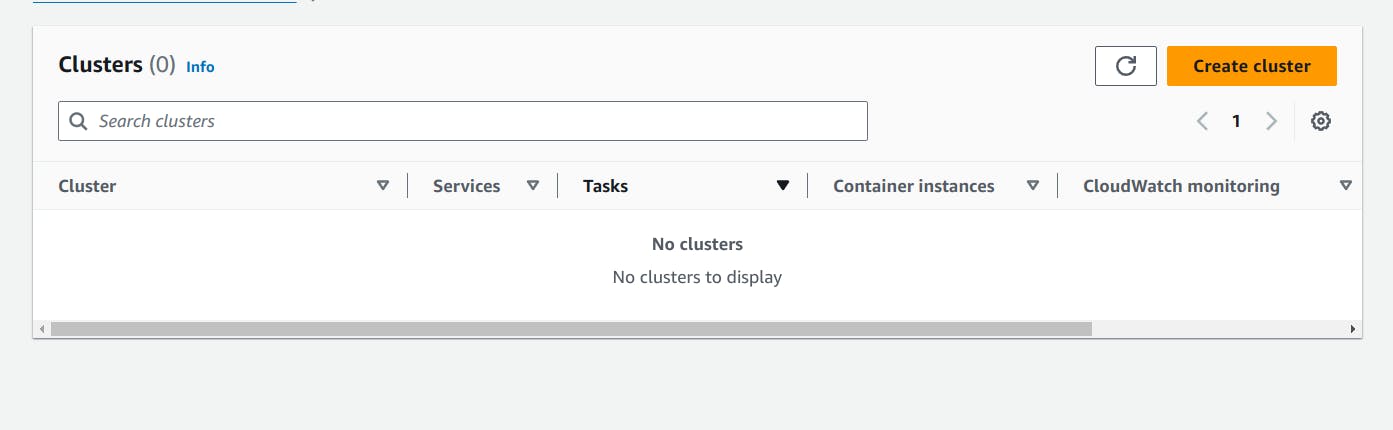
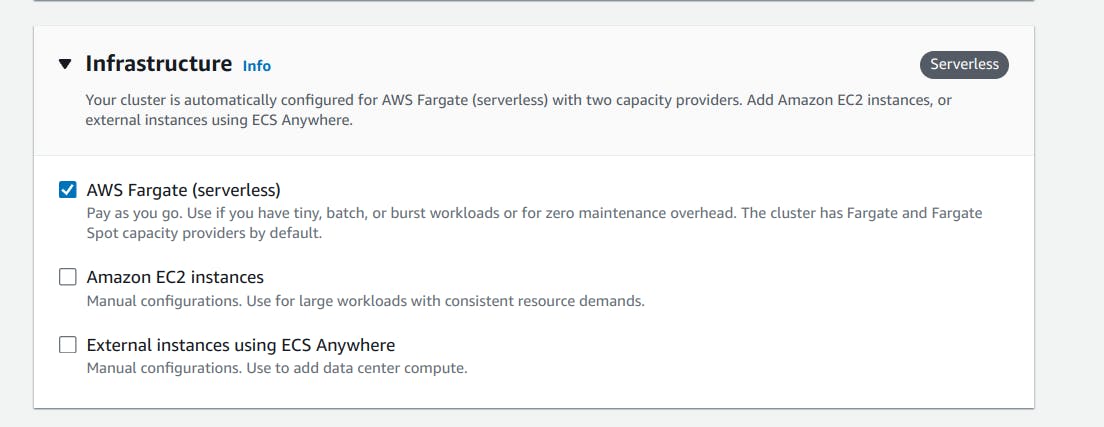
📍 Setting up an ECS Cluster
Now navigate over to Amazon ECS and click on "Create Cluster".
Here also as said before with ECR, keep the rest of the configuration the way they are and only name your ECS Cluster and wait for it to set up.
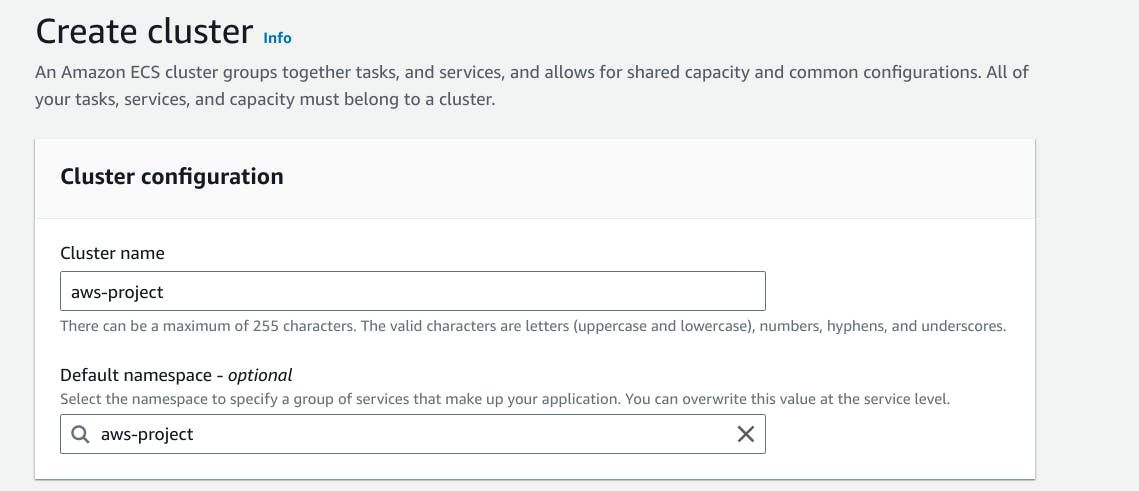
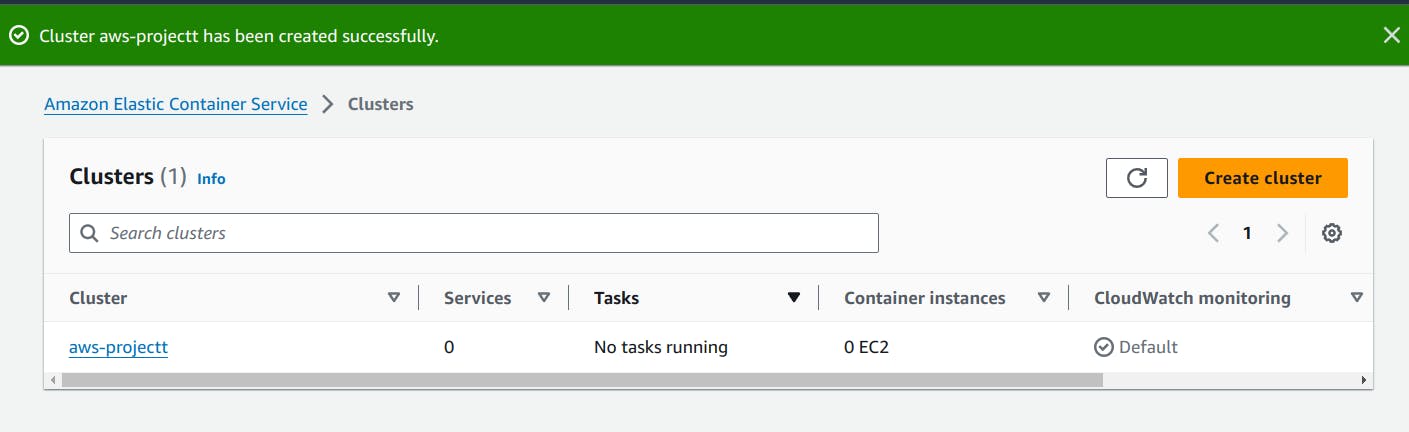
Woohoo!! You can see our cluster is now visible under Clusters Tab of ECS, which implies it was successfully created.
📍 Configuring Task Definition for ECS
After successfully creating and ensuring the ECS cluster is operational without any issues, the next step is to start running tasks on it.
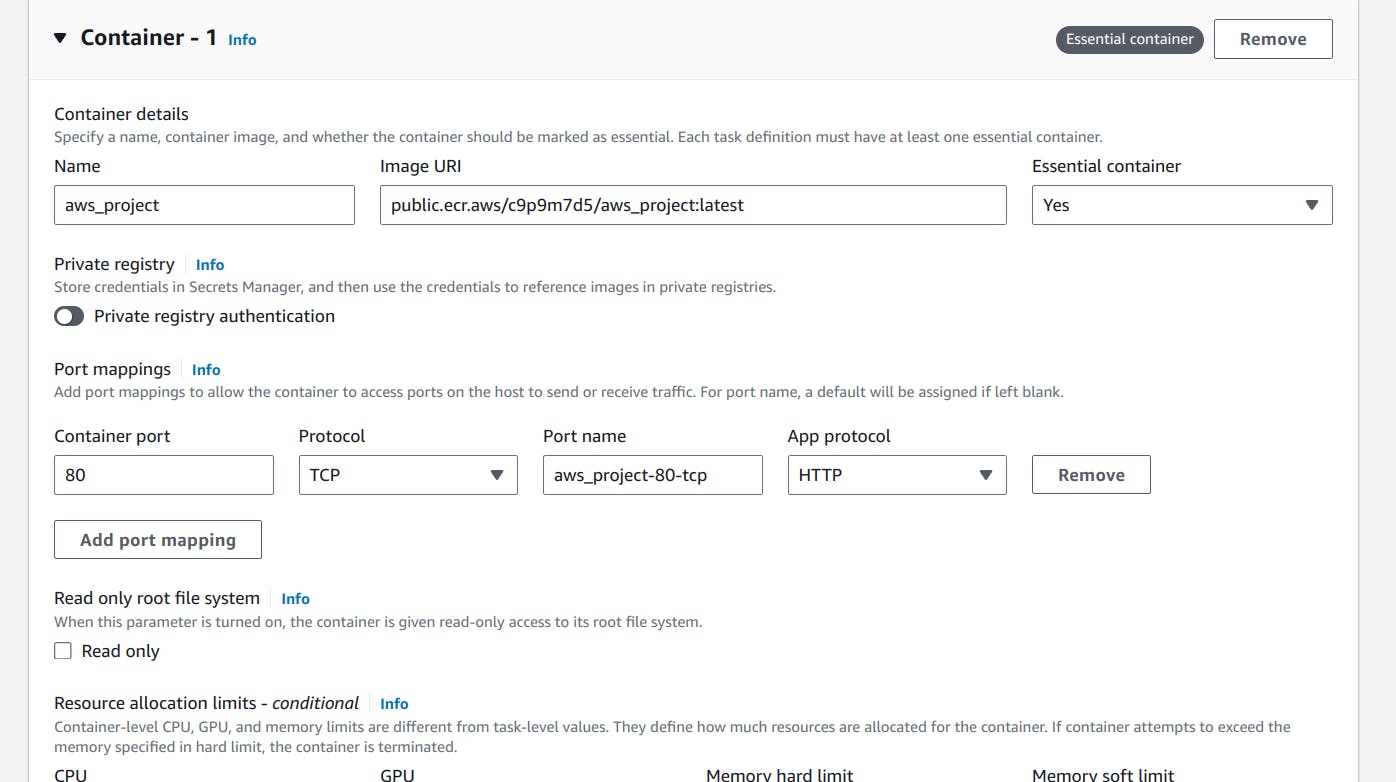
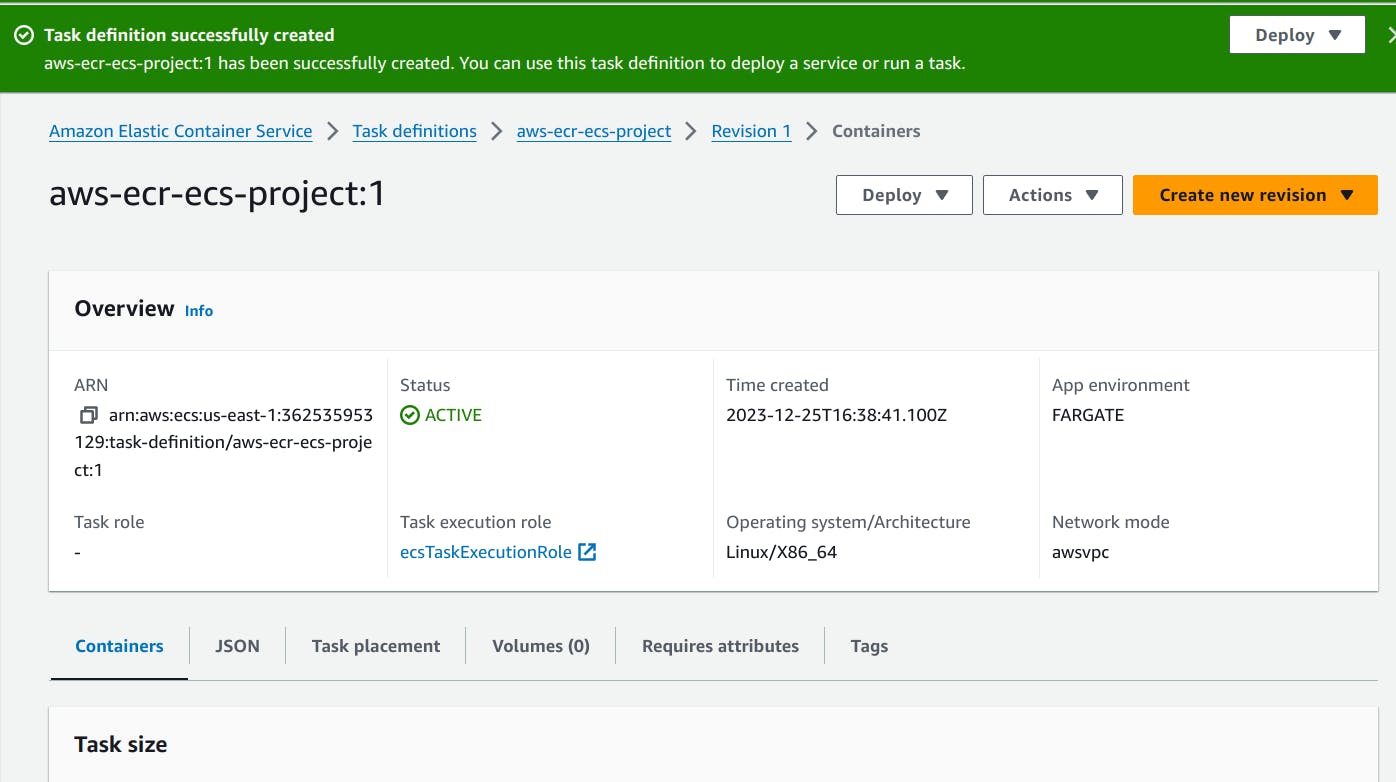
Now, the focus should be on creating a task definition for the application, which will define the Docker image and other specific configurations necessary to run our application. To begin, we need to configure the task definition by assigning a task name and including the image URL from our Amazon ECR, along with the necessary port number, and click on “Create”.
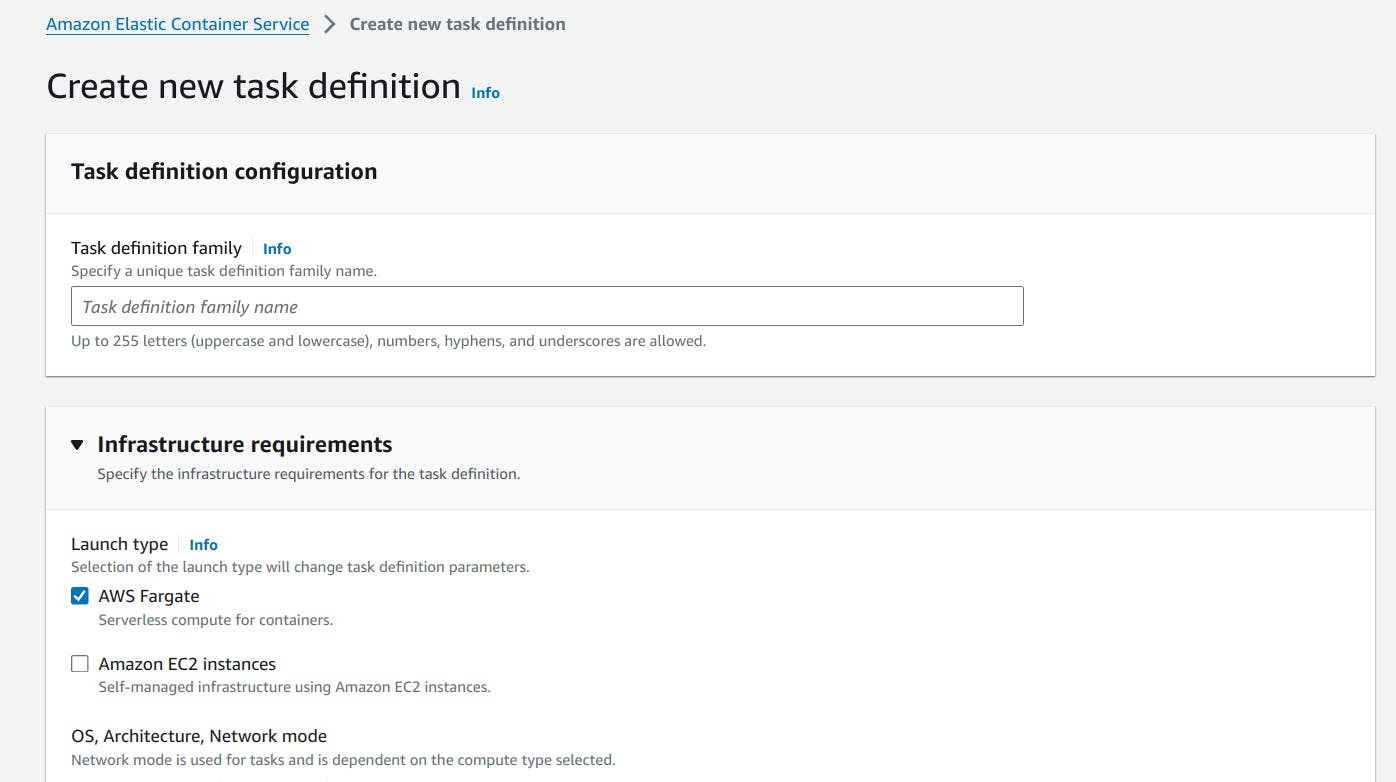
Give an appropriate name to our "task definition". Here I went along with "aws-ecr-ecs" (don't ask me why).
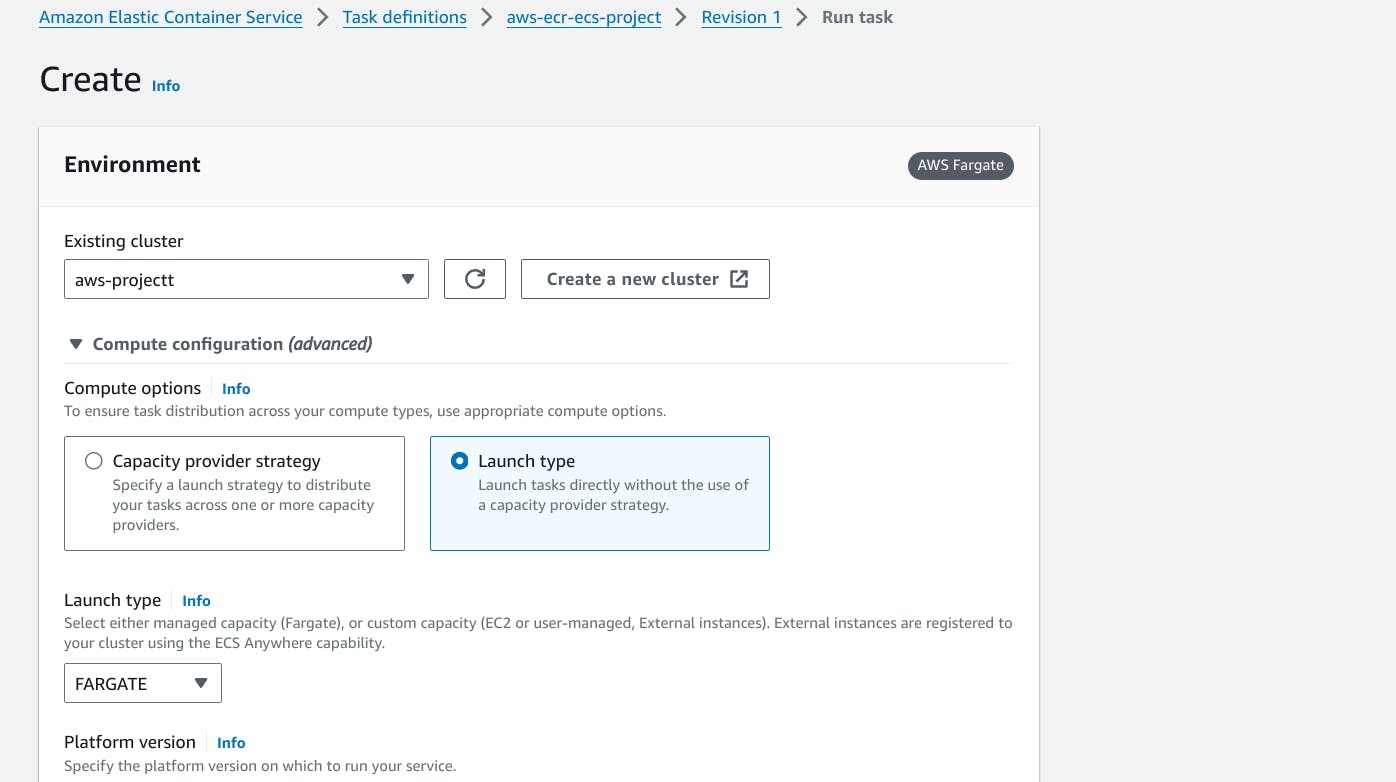
Now that our task definition has been successfully created we now need it to run so that our task to deploy and manage containers for our applications in a scalable and efficient manner. So, we select the task and click on “Run Task”.
Here, it asks us to choose an existing cluster so we choose our ECS cluster "aws-projectt" and then we create a new security group having an inbound rule of type "Custom TCP" and the port range "80".
Now when we save our task, the container's task definition will initiate and start running.
How much more do we have to do?
We're pretty much done, now all you have to do is copy the Public IP address of container and you'll observe that our application or website is now live.
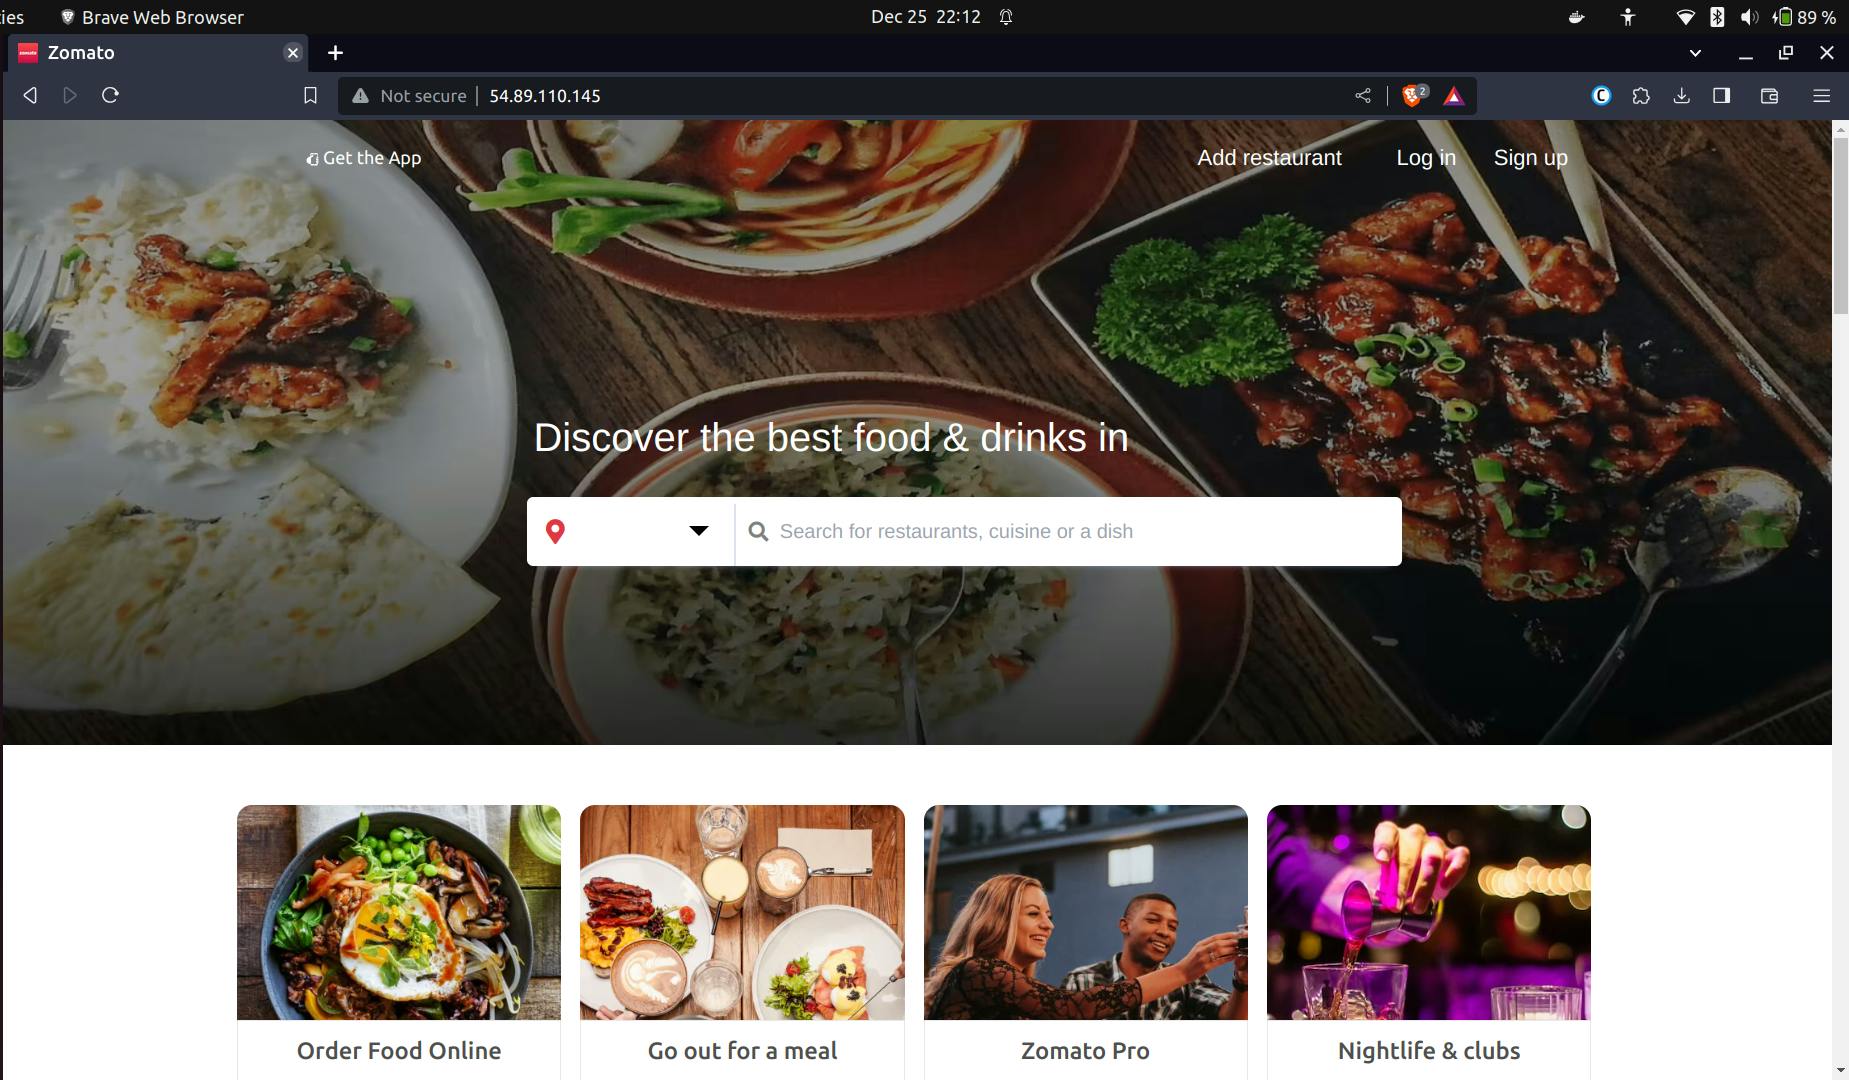
And NOW WE'RE DONE!!
☁️ Conclusion
Well that was amazing learning how to use Amazon Container Services and what all do they offer but if you wanna read about them in detail, I would recommend checking out their official documentation.
Well that's all for now but we'll meet again soon in our next blog.
Till then you can follow me on LinkedIn and Twitter.